
In the second part of our Kubernets guide, we go through how you connect to the cluster so you can manage it.
In Part 1 – Create a cluster, we configured a cluster with magnum, now it’s time to complete the configuration so that we can connect to our new cluster. To follow this guide, a working Kubernetes cluster in Binero.Cloud is required.
Prerequisites
Computer with access to tools such as curl, python and the like, e.g. windows 10 with WSL (Windows Subsystem for Linux), Mac or any Linux distribution.
To run openstack commands via CLI (which we do in this guide) we need the openstack CLI client installed on our computer, information on how to install and configure the client can be found here: https://docs.openstack.org/python-openstackclient/train/ and here for the magnum part: https://docs.openstack.org/python-magnumclient/train/
We also need kubectl installed on the computer. You can read more about this here
To install kubectl you can run these commands on a compatible computer (linux in this example):
$ curl -LO https://storage.googleapis.com/kubernetes-release/release/`curl -s https://storage.googleapis.com/kubernetes-release/release/stable.txt`/bin/linux/amd64/kubectl
$ chmod +x ./kubectl
$ sudo mv ./kubectl /usr/local/bin/kubectl
Access (command prompt)
Once the client is installed and configured, we can run:
$ eval $(openstack coe cluster config CLUSTER_NAME)
Where CLUSTER_NAME is the name of the cluster we created, we can list our clusters with
$ openstack coe cluster list
Access (user certificate)
We can also create our own user instead if we want. We do this by first generating a certificate and a CSR
(Certificate Signing Request) for that user.
In this example, binero-demo is the name of the new user
$ openssl req -newkey rsa:2048 -nodes -keyout binero-demo.key -out binero-demo.csr -subj "/CN=binero-demo"
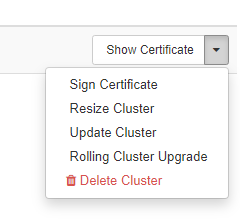
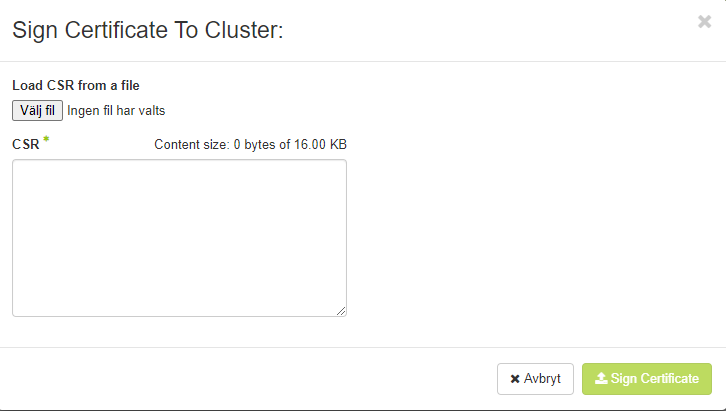
When the certificate is generated, we go to Container Infra -> Clusters and click Sign Certificate
There we either paste the content from the CSR file we generated earlier or upload it.
When we have done that, the page will download a certificate that is signed by our cluster, we will also download the CA certificate from the cluster by clicking the “Show Certificate” button from the previous step.
This is what a “standard” kubectl configuration looks like
apiVersion: v1
clusters:
- cluster:
 certificate-authority-data: CA_DATA
 server: API_ADDRESS
name: CLUSTER_NAME
contexts:
- context:
 cluster: CLUSTER_NAME
 user: binero-demo
 name: binero-demo@CLUSTER_NAME
kind: Config
users:
- name: binero-demo
 user:
 client-certificate-data: CLIENT_CERTIFICATE_DATA
 client-key-data: CLIENT_KEY_DATA
We will replace
CA_DATA
API_ADDRESS
CLUSTER_NAME
CLIENT_CERTIFICATE_DATA
CLIENT_KEY_DATA
with real values
We find API_ADDRESS either in Horizon by expanding the cluster information

Or by running
$ openstack coe cluster show CLUSTER_NAME | grep api_address
We can replace the other variables with base64-encoded data:
$ cat CA_NAME.crt | base64 | tr -d '\n'
$ cat CLIENT_CERTIFICATE.pem | base64 | tr -d '\n'
$ cat CLIENT_KEY.key | base64 | tr -d '\n'
After this we need to add the user to cluster admins, we do this by accessing one of the master nodes over ssh and there we run
$ kubectl create clusterrolebinding binero-demo --clusterrole=cluster-admin --user=binero-demo
After we have updated the configuration above, we can list all resources in the cluster.
$ kubectl get nodes NAME STATUS ROLES AGE VERSION binero-demo-6b35sg3h245afz-master-0 Ready master 1h v1.15.7 binero-demo-6b35sg3h245afz-master-1 Ready master 1h v1.15.7 binero-demo-6b35sg3h245afz-node-0 Ready1h v1.15.7 binero-demo-6b35sg3h245afz-node-1 Ready 1h v1.15.7
Ingress
Now we are ready to complete the configuration of traefik.
The advantage of running an ingress controller such as traefik is that we can easily control traffic based on host, path etc.
We can also configure a certificate manager such as cert-manager so that we can automatically provision certificates for our web services.
To begin with, we need to tell our cluster that we will use the 2 new nodes we created as “ingress” nodes, we do this by putting the label: role=ingress on the node with kubectl
$ kubectl label node NODE_NAME role=ingress
NODE_NAME is the name of the node, e.g.
$ kubectl label node binero-demo-6b35sg3h245afz-node-0 role=ingress
$ kubectl label node binero-demo-6b35sg3h245afz-node-1 role=ingress
After this, we also need to mark the nodes so that the cluster autoscaler does not scale them down as we use these as ingress nodes:
$ kubectl annotate node binero-demo-6b35sg3h245afz-node-0 cluster-autoscaler.kubernetes.io/scale-down-disabled=true
$ kubectl annotate node binero-demo-6b35sg3h245afz-node-1 cluster-autoscaler.kubernetes.io/scale-down-disabled=true
Now that we have configured our cluster, we need to look at how we can forward the traffic to our ingress nodes, you can read more about how we do it in part 3 – A simple application