
Terraform is a tool for building, changing, and versioning infrastructure safely and efficiently. Terraform supports management of different service providers using a provider plugins. The OpenStack provider is used to interact with the many resources supported by OpenStack. The provider needs to be configured with the proper credentials before it can be used.
Installing Terraform
Latest release of Terraform CLI can be installed by following the official installation guide.
Configuring an OpenStack Provider
- Create an empty directory demo and an empty file demo.tfin that directory.
- Configure terraform construct with OpenStack provider name and version.
terraform {
 required_providers {
 openstack = {
 source = "terraform-provider-openstack/openstack"
 version = "1.40.0"
  }
  }
  }
3. To interact and manage a targeted OpenStack deployment, a user openrc file details are needed and it can be provided in two ways:
a. Exporting openrc variables in the environment.
i. Go to Project -> API Access section on horizon .
ii. Click on Download OpenStack RC File.
b. Using openstack provider construct in tf files. Refer this for more configuration parameters.
Configure the OpenStack Provider
 provider "openstack" {
 user_name = "demo-user"
 tenant_name = "demo-project"
 password = "demopass"
 auth_url = "https://auth.binero.cloud:5000/v3"
 region = "europe-se-1"
 endpoint_type = "public"
  }
4. Once done, run command terraform init After successful completion, terraform-provider-openstack will be installed successfully.
Creating OpenStack Resources
Terraform supports two kind of construct when interacting with OpenStack:
1. Resources – Resource to manage in OpenStack.
Example – This manages a router resource within OpenStack.
resource "openstack_networking_router_v2" "demorouter" {
 name = "demorouter"
 admin_state_up = true
 external_network_id = "35164b56-13a1-4b06-b0e7-94c9a67fef7e"
  }
2. Data Sources – Details of resources already existing and to be consumed in resource management.
Example – To use a data source to get a list of compute availability zones from OpenStack.
data "openstack_compute_availability_zones_v2" "zones" {}
Details of supported Resources and Data Sources construct can be found in official terraform OpenStack Provider documentation. An example of managing a VM using terraform is described below.
Manage a VM using Terraform
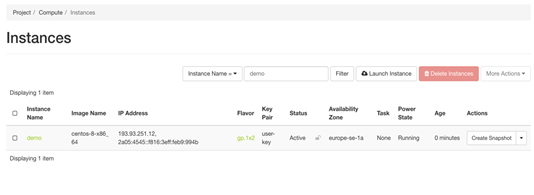
Using the demo.tf from before, add it with below content. The template will create a VM based on CentOS 8 with flavor gp.1×2.
data "openstack_compute_flavor_v2" "demoflavor" {
 name = "gp.1x2"
  }
 data "openstack_images_image_v2" "centos8" {
 name = "centos-8-x86_64"
  }
 resource "openstack_compute_instance_v2" "demo" {
 name = "demo"
 image_id = data.openstack_images_image_v2.centos8.id
 flavor_id = data.openstack_compute_flavor_v2.demoflavor.id
 key_pair = "user-key"
 security_groups = ["default"]
 metadata = {
 this = "that"
  }
 network {
 name = "europe-se-1-1a-net0"
  }
  }
2. To create resource, run command terraform apply
Security Group Details
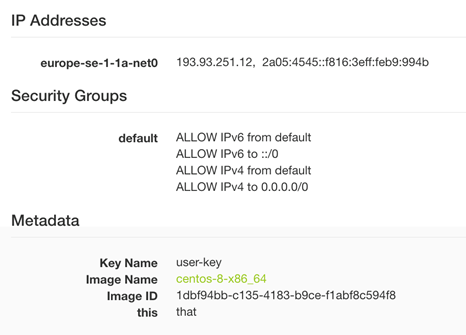
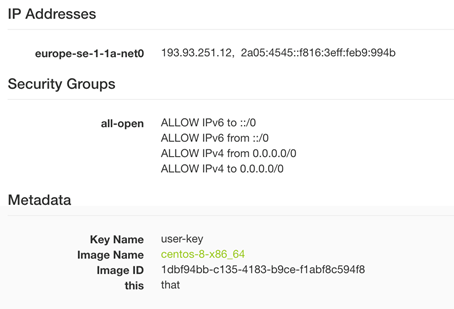
We can update the demo.tf file and change from security_groups = ["default"] tosecurity_groups = ["all-open"] to apply the all-open security-group instead of default, to update this we run terraform apply again, and after that we need to confirm the change in horizon by pressing “Confirm Resize” on the VM.
Security Group Details (after Update)
To delete the resources, run command terraform destroy
