RKE is a CNCF-certified Kubernetes distribution that runs entirely within Docker containers. RKE solves the problem of installation complexity, a common issue in the Kubernetes community. As long as you can run a supported version of Docker, you can deploy and run Kubernetes with RKE. RKE supports management on different cloud providers using provider plugins. The OpenStack provider is used to interact with the many resources supported by OpenStack and deploy the Kubernetes on the OpenStack VMs. The provider needs to be configured with the proper credentials before it can be used.
Installing RKE
Latest release of RKE can be installed locally by following the official installation guide.
Node Preparation
Create the virtual machines required to be used as nodes for Kubernetes installation. It is a pre-requisite that docker is installed on all the virtual machines. For a complete list of pre-requisites and node preparation, please follow the steps in the official requirements guide.
For this guide, two virtual machines will be created where rancher-node-1 will be treated as the control & etcd host and rancher-node-2 will be treated as the worker host.
Run the following commands to install docker on both instances
$ curl https://releases.rancher.com/install-docker/20.10.sh > install.sh
$ sh install.sh
$ sudo usermod -aG docker $USER
Terminate the terminal session and reconnect after adding your user to the docker group. Validate that you are able to use the docker CLI docker ps
Configuring an OpenStack Provider
- Create a directory demo and an empty file cluster.yml in that directory.
- Run command
rke config -name cluster.ymland provide the prompted details. Provide the corresponding OpenStack instance name to the Override hostname of host prompt when configuring host details. - Open and edit the cluster.yml file. Go to the cloud_provider section and provide the necessary details. Refer to this for a complete list of configuration parameters.
# Configure the OpenStack Provider
 cloud_provider:
 name: "openstack"
 openstackCloudProvider:
 global:
 username: 'demo-user'
 password: 'demopass'
 auth-url: https://auth.binero.cloud:5000/v3
 tenant-name: 'demo-project'
 domain-name: 'Default'
region: 'europe-se-1'
 load_balancer:
 use-octavia: true
 subnet-id: demo-subnet-id
 # Floating network: europe-se-1-1a-net0
 floating-network-id: 35164b56-13a1-4b06-b0e7-94c9a67fef7e
 block_storage:
 ignore-volume-az: false
 route:
 router-id: demo-router-id
- Once done, run command rke up. After successful completion the Kubernetes cluster will be installed successfully.
- Two new files cluster.rkestate and kube_config_cluster.yml will be present in the demo directory.
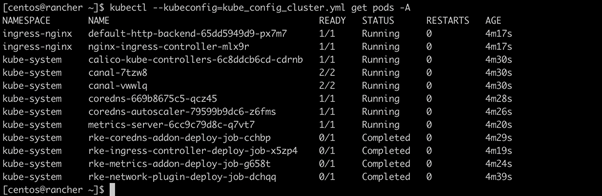
- Use the kube_config_cluster.yml file with kubectl to check the cluster health and perform operations.
Sample output:
Creating a PersistentVolumeClaim using Cinder Service
- Export kube_config_cluster.yml to KUBECONFIG environment variable.
export KUBECONFIG=kube_config_cluster.yml - Create a storage class YAML file storageclass.yaml based on ssd volume type and europe-se-1a availability zone.
kind: StorageClass
 apiVersion: storage.k8s.io/v1
 metadata:
 name: ssd-demo
 annotations:
 storageclass.beta.kubernetes.io/is-default-class: "true"
 provisioner: kubernetes.io/cinder
 parameters:
 type: ssd
 availability: europe-se-1a
- Run command
kubectl create -f storageclass.yaml - Create a persistent volume claim YAML file pvc.yaml using the storage class ssd-demo in annotations.
kind: PersistentVolumeClaim
 apiVersion: v1
 metadata:
 name: cinder-claim
 annotations:
 volume.beta.kubernetes.io/storage-class: "ssd-demo"
 spec:
 accessModes:
 - ReadWriteOnce
 resources:
 requests:
 storage: 1Gi
- Run command
kubectl create -f pvc.yaml - Get the details of the created persistent volume claim cinder-claim.
kubectl get pvc

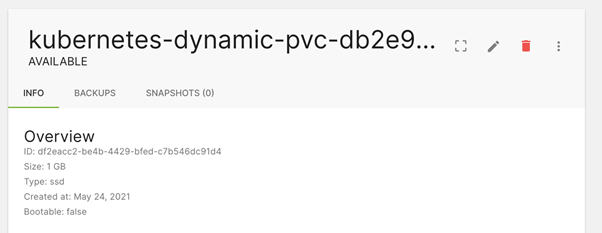
You can now verify that a volume is created in the volumes section of the dashboard.