
A very useful feature in Binero.Cloud is the virtual private networks. A private network allows your instances to communicate without a public IP, it also enables the use of Floating IPs. Floating IPs are movable between instances. You can also save the IP if you delete or restore your instance (Read more about it here).
How to use:
To get started with your virtual network, and afterwards connect the floating IP (and access the “internet”), you need a router, a network and a subnet (and a number of ports / interfaces configured).
Create network and subnet
- Start by logging in to your cloud portal and click “Network”
- Then press the green button at the bottom right, and then the “+ icon” / “Create network”
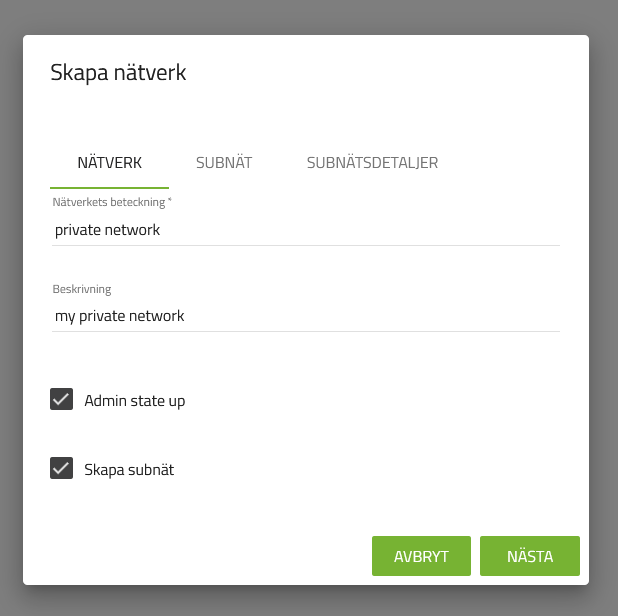
- In the first tab “Network”, choose a name for the network, as well as a description. Make sure the “Admin state up” and “Create subnet” boxes are checked.
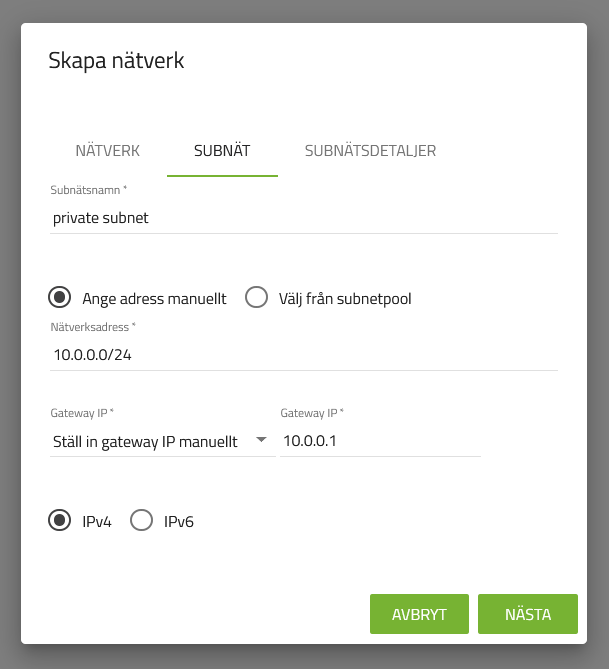
- In the second tab “Subnet”, select the name of your network, and make sure “Enter address manually” is checked. In the “Network address” field, enter an IP network in CIDR format. In the example, we use 10.0.0.0/24 (which corresponds to the IP addresses 10.0.0.1 – 10.0.0.255), but you can choose the range that suits you. This tool is very helpful for calculating CIDR based on ranges. Then select the IP address of the gateway. In the guide, we specify “10.0.0.1” as the gateway (which will be the router we create later). Finally, select the protocol (this guide uses IPv4)
- In the last tab “Subnet details”, select whether you want to use automatic IP allocation (DHCP) and if so, what range the allocation pool should have. In our example, we have set the range to 10.0.0.10 – 10.0.0.254. You can also specify name servers / resolvers to be used in this network (In our example we have filled in google’s 8.8.8.8).
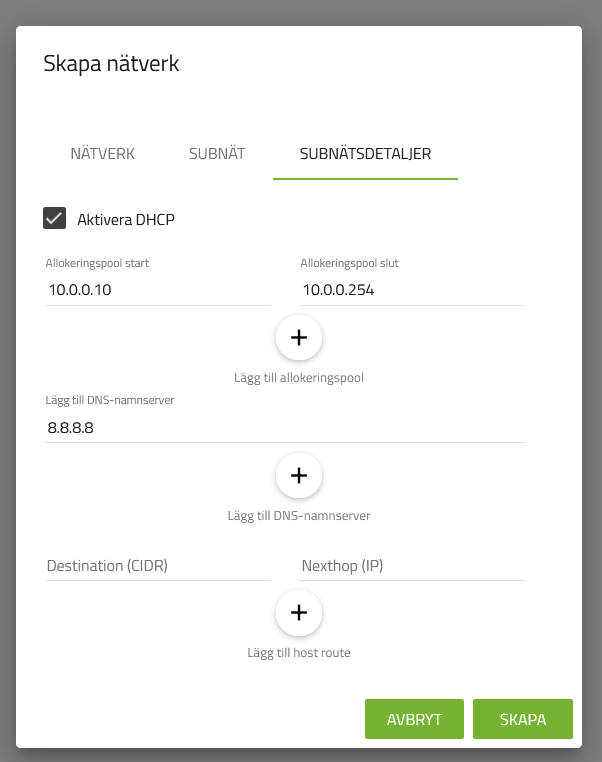
- Then click “Save” and your network and subnet will be created, along with two ports.
Create a router
- Inside your cloud portal, click on “Routers” and then the green + icon at the bottom right.
- You can now choose the name and description of your router, and if you want to connect it to the external network we provide (“provider1”) which is a must if you want to have access to the internet and assign floating IPs to ports in this network. This can’t be changed afterwards. Also check “Admin state up”.
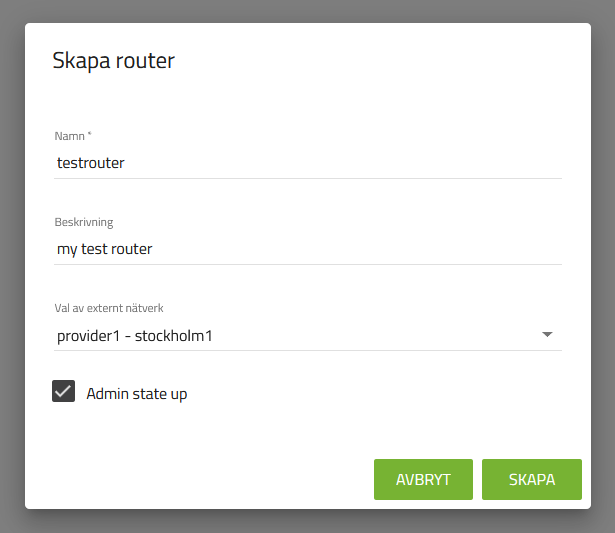
- Then click “Create” and your router will be created with an external gateway to the public network “provider1”.
- Once the router has been created, click on the “Add network interface” button for your router.
- In the box that now appears, select the subnet you created in step one of this guide (in our example “private network”) and fill in the IP address you selected as the gateway when you created the network (in our example 10.0.0.1 ).
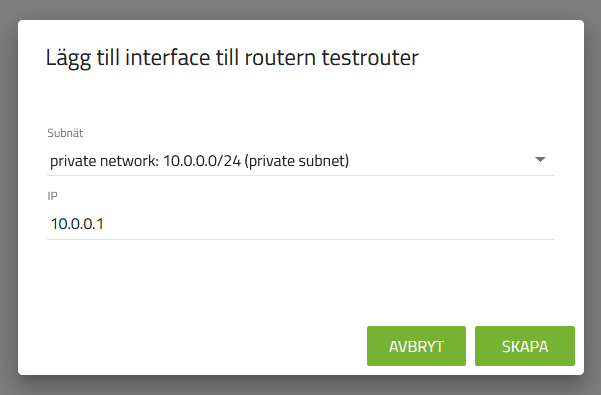
- Then click “Create” and a port will be set up on the network you created, to which the virtual router is connected.
Now you are ready to use the network!
- You are now done with the setup of your network, and can now begin and connect instances to it, and if you then want to, you can allocate floating IPs to these ports so selected instances can be accessed from outside your network. You can read more about this in the guide “How to use Floating IP“.
- You are now done with the setup of your network, and can now begin and connect instances to it, and if you then want to, you can allocate floating IPs to these ports so selected instances can be accessed from outside your network. You can read more about this in the guide “How to use Floating IP“.
